How Many Cartons Fit in a Container? A Worked Loading Calculation
Calculate carton capacity step by step: external dimensions, uniform grids, payload, rotations and a reproducible 20GP example with remaining cargo.
What this container loading calculation can tell you
A container loading calculator answers a practical question: how many complete packages can fit inside a particular container, subject to the assumptions you enter? It is more useful than dividing a shipment volume by a nominal container capacity, because real boxes occupy discrete positions. Empty strips beside a row or above a stack cannot always be used by another carton. The result should therefore include a layout and a remaining quantity, not just a percentage.
This guide works through a single carton size before explaining when to move to mixed-cargo planning. The numbers below are a reproducible worked example, not a customer shipment or a promise of achievable performance. The free LoadVis calculator keeps cartons upright, checks two horizontal orientations when rotation is enabled, and compares a uniform grid with the selected payload. It does not search every possible arrangement or certify a shipment for transport.
Step 1: measure the finished shipping carton
Measure the outside of the packed shipping carton after closing it. Product dimensions taken from a catalogue can omit foam, edge protection, handles and the carton itself. If cartons bulge after packing, use the largest repeatable outside measurements rather than the unfilled box dimensions. Record the unit next to every value. The free calculator expects centimetres for length, width and height and kilograms for the gross weight of one complete carton.
Keep the carton quantity separate from the number of individual products. If six retail units are packed into one shipping carton, a shipment of 600 retail units may be only 100 cartons. Entering 600 cartons would overstate both volume and weight by a factor of six. Before calculation, have a second person compare the carton count with the packing list and confirm whether the entered weight is per carton or for the whole shipment.
Step 2: use actual container dimensions
A container name describes an equipment category, not a guaranteed usable rectangle. The trial uses illustrative internal dimensions of 589 by 235 by 239 cm for 20GP, 1203 by 235 by 239 cm for 40GP, and 1203 by 235 by 269 cm for 40HC. These are calculation assumptions. Confirm the assigned equipment with the carrier; door openings, fittings and the condition of the floor can restrict what can be loaded.
The trial payload assumptions are 28,000 kg, 26,700 kg and 26,500 kg respectively. They are not substitutes for the actual container plate or shipment-specific restrictions. Do not confuse maximum gross container mass with the mass of cargo that can be added. If your confirmed usable dimensions or permitted cargo mass differ from the trial assumptions, create a container with the appropriate values in the full planning workspace and have the transport arrangements checked separately.
Step 3: calculate carton volume and the volume-only ceiling
Consider 500 identical cartons measuring 60 by 40 by 40 cm, each weighing 15 kg gross. One carton occupies 96,000 cubic centimetres, or 0.096 cubic metres. The order volume is therefore 48 cubic metres and the cargo mass is 7,500 kg. Those totals describe the shipment, but they do not tell us how many cartons can actually be placed in a 20GP container with the illustrative dimensions used here.
Multiplying 5.89 by 2.35 by 2.39 gives an internal rectangular volume of about 33.082 cubic metres. Dividing that number by 0.096 suggests roughly 344 complete carton volumes. This is only a volume ceiling under an idealized rectangular model. A carton cannot be split to fill several narrow spaces. The difference between that ceiling and a feasible grid is exactly why a loading calculation needs to inspect individual dimensions.
Step 4: count complete cartons along each axis
With the carton kept at 60 cm along the container length, 40 cm across the width and 40 cm vertically, the available counts are floor(589/60) = 9, floor(235/40) = 5 and floor(239/40) = 5. The grid contains 9 × 5 × 5 = 225 cartons. The floor operation matters: a fraction of a carton position is not usable capacity. Rounding any axis upward would describe boxes extending outside the container.
The unused lengths in this orientation are 49 cm along the container, 35 cm across its width and 39 cm above the stack. That space is visible in a floor layout, but its total volume is not automatically available for another complete carton. In a real packing search some mixed orientations might recover part of it. The free calculator deliberately reports a simple uniform grid rather than presenting that grid as a globally optimal result.
Step 5: compare a permitted horizontal rotation
When horizontal rotation is enabled, the trial also tests 40 cm along the container and 60 cm across it while retaining the 40 cm carton height. The axis counts become floor(589/40) = 14, floor(235/60) = 3 and floor(239/40) = 5. That orientation holds 14 × 3 × 5 = 210 cartons. For this particular carton and container, the original uniform orientation has the higher count, so the basic estimate remains 225 cartons.
Rotation is a physical permission, not merely an optimization switch. A carton may need a printed face upright, may contain a product that cannot be laid on its side, or may have lifting instructions that limit handling. The trial only turns cartons around the vertical axis; it never changes which carton dimension is vertical. If the proposed orientation is not acceptable for your packaging or handling equipment, disable rotation and retain the approved orientation in the planning record.
Step 6: apply the weight limit and requested quantity
A geometric layout is only one upper bound. With the trial 20GP payload assumption of 28,000 kg and a 15 kg carton, the mass limit permits floor(28000/15) = 1,866 cartons. Geometry is therefore the binding restriction in this example. The calculator takes the smallest of the geometric count, the payload count and the requested quantity. It reports 225 cartons loaded, 275 remaining, and 3,375 kg of loaded cargo for the 500-carton request.
To see a different binding restriction, keep the dimensions but change the per-carton weight to an illustrative 1,000 kg. The weight limit then allows only 28 cartons, even though the rectangular grid has many more positions. This is a mathematical comparison, not a recommended cargo configuration. The free estimate checks total mass only. It does not analyze local floor loads, axle loads, structural support or whether the illustrated placement distributes weight appropriately.
Step 7: read utilization without overinterpreting it
For 225 cartons, occupied carton volume is 225 × 0.096 = 21.6 cubic metres. Dividing 21.6 by the illustrative 33.082 cubic metres gives approximately 65.3 percent volume utilization. This percentage measures the carton volume included in the result against the internal rectangular volume used by the calculation. It does not mean that every remaining space can accept another carton, and it is not an assessment of handling quality or cargo security.
A lower utilization result can be reasonable when dimensions leave unusable gaps, stacking is restricted, the payload is reached first, or the order quantity is small. Conversely, a high percentage does not prove that workers can reproduce the arrangement. Read the count, remaining quantity, dimensions and assumptions together. If a quoted utilization percentage has no accompanying loading layout and no stated constraints, ask how it was obtained before using it to choose equipment or quote freight.
Step 8: inspect the floor preview
The free calculator shows the first layer viewed from above. Each rectangle corresponds to a carton footprint in the selected uniform orientation. Count the rows and columns, identify the empty strips, and compare the diagram with the reported length-by-width-by-layers grid. The preview is capped at 200 rectangles to keep the browser responsive. For a very small carton, the displayed rectangles may therefore show only part of the first layer; the numerical result still uses the whole grid.
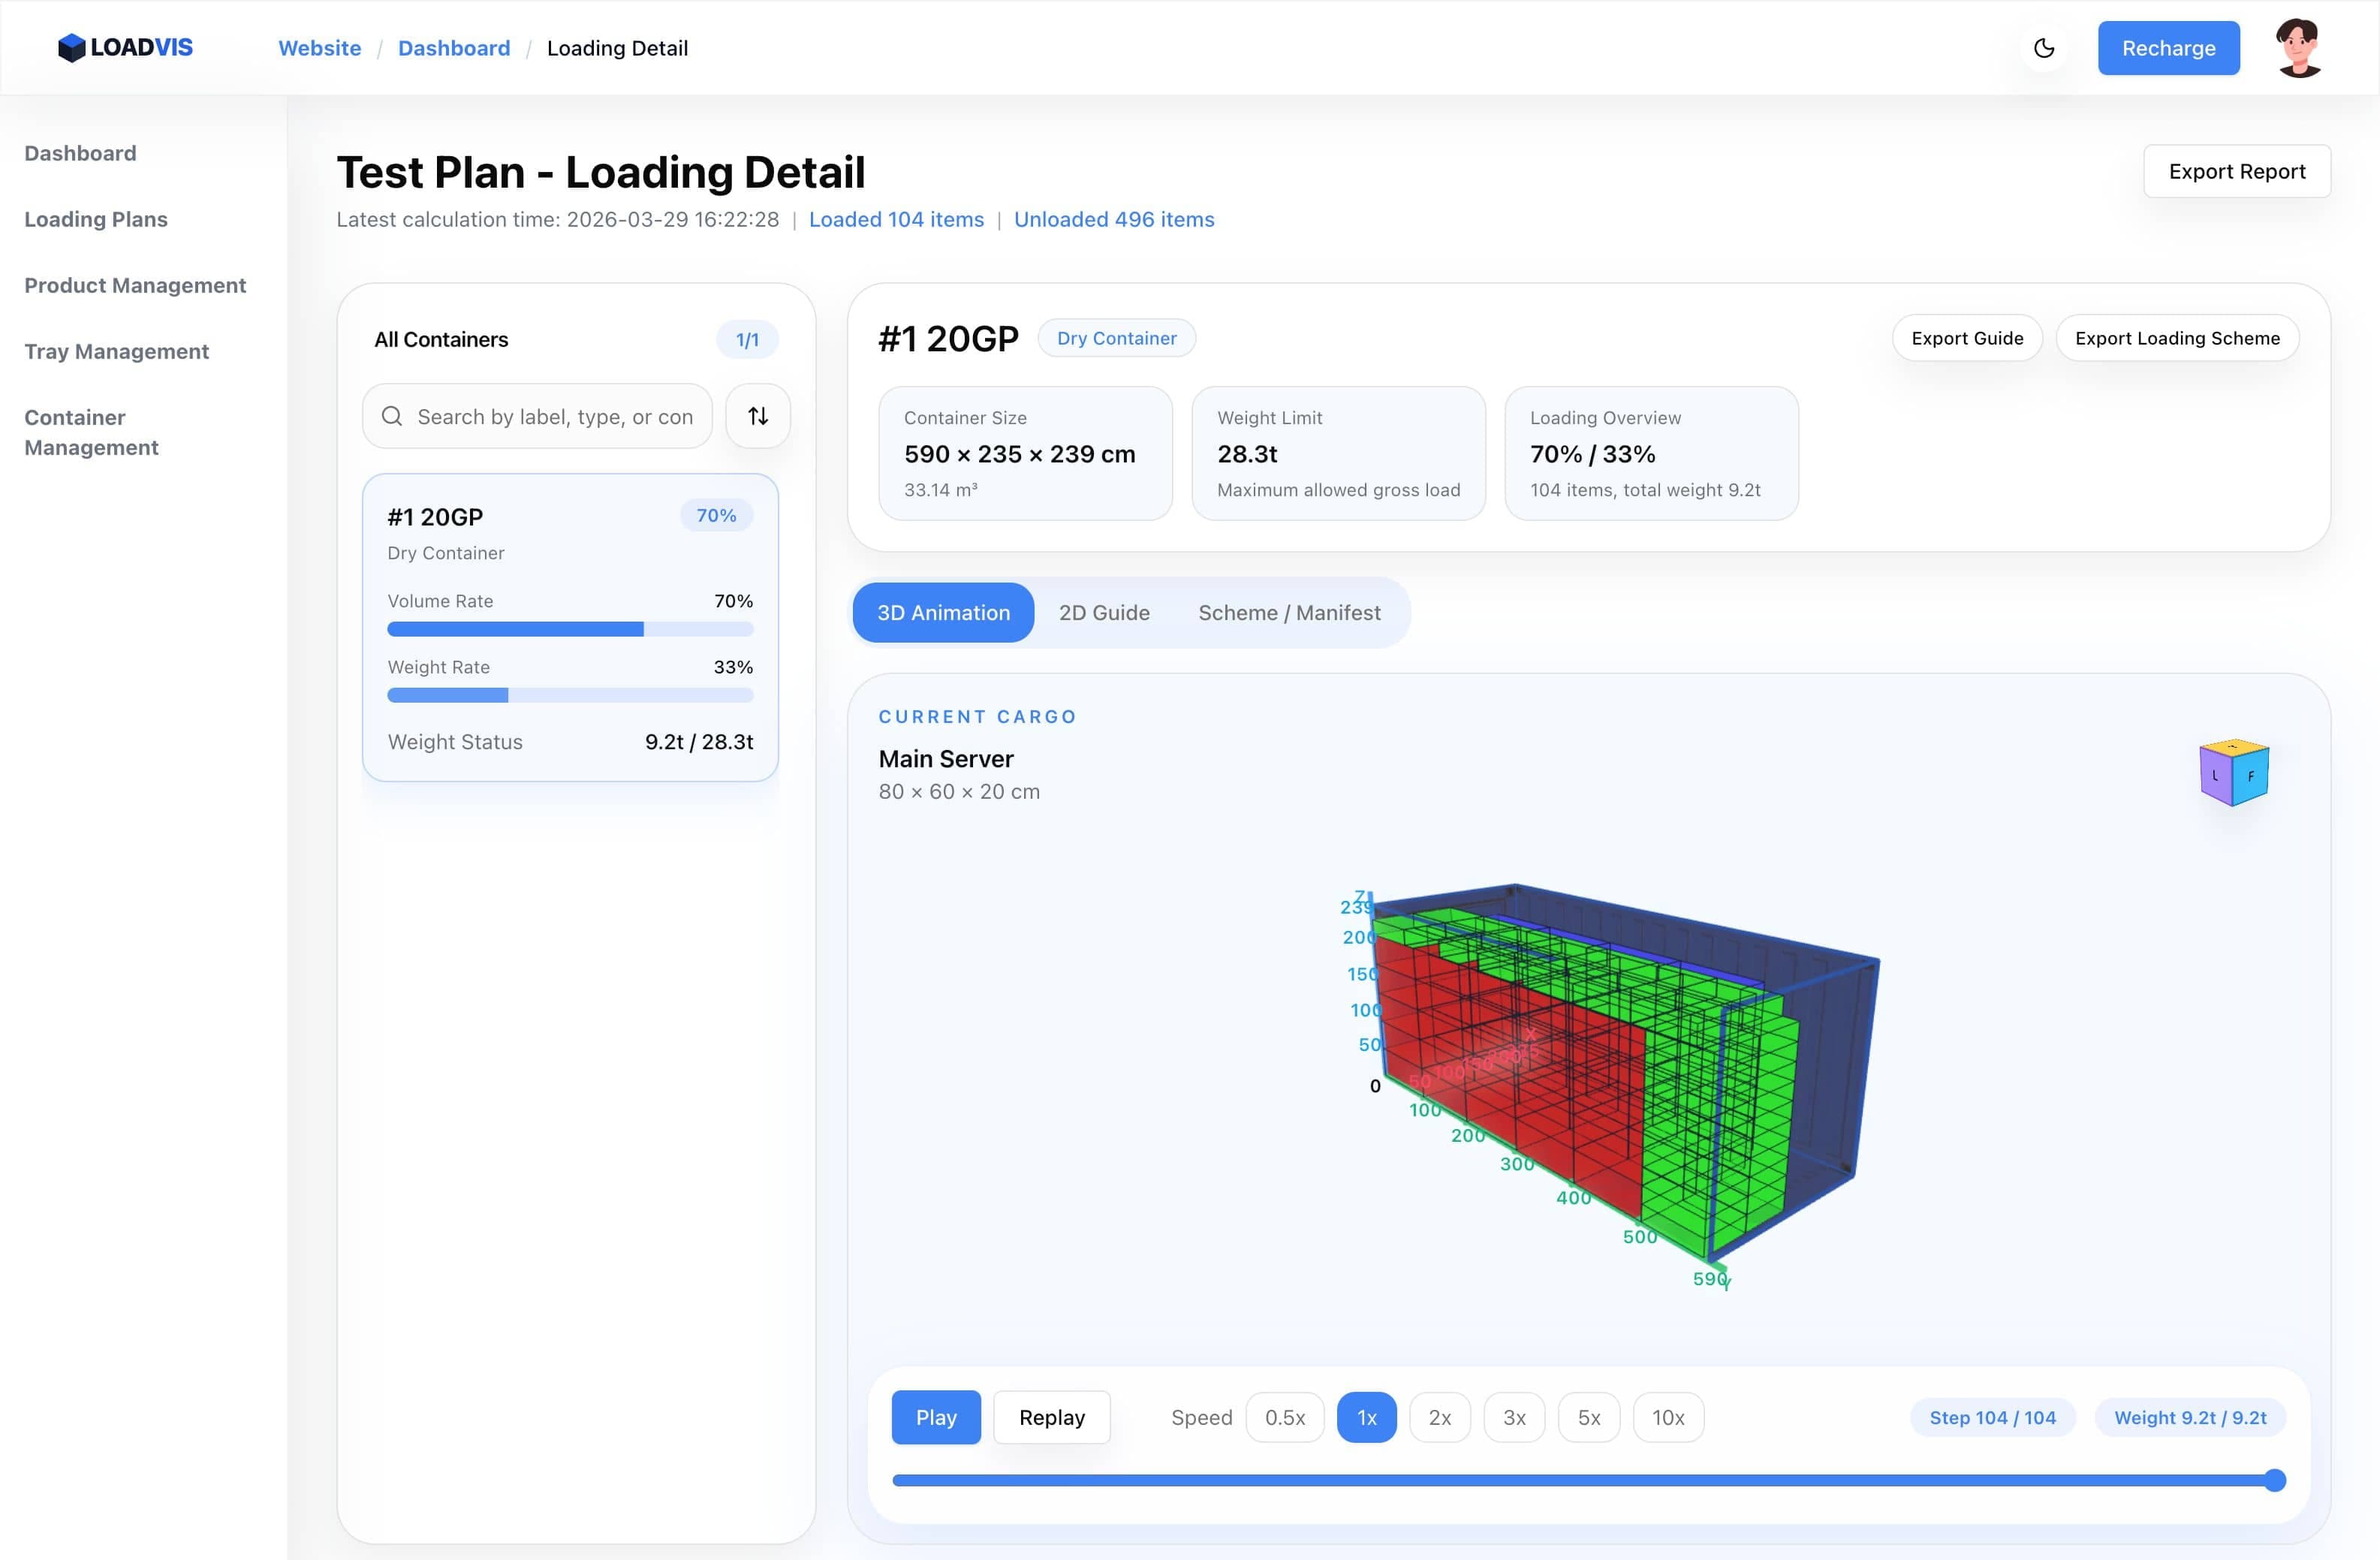
The illustration accompanying this guide shows the separate full-workspace result screen, including its loaded and unloaded totals, container summary and 3D playback. It is an example of where to inspect a complete solution, not the output of the 60 by 40 by 40 cm example. Use the screenshot to locate result controls and distinguish a full 3D plan from the free floor preview. Interface details can change as the product is updated.
Step 9: test the variable that could change your decision
Change one assumption at a time so you can explain the difference. Compare the same cargo in another container category, or compare a confirmed revised packaging size against the original. Keep carton count and mass consistent when testing dimensions. If reducing an outside dimension requires new packaging, do not treat the smaller size as available until the packaging team confirms protection, manufacturing tolerance and the final packed dimensions.
For a useful comparison record, note the input version, container assumptions, allowed rotation, loaded count, remaining count and loaded mass. A result with more cartons is only useful if the change that produced it is physically available. Retain both versions when asking the warehouse or carrier to review a choice. This makes the discussion about specific assumptions rather than two unexplained percentages copied from different calculations.
Step 10: move to mixed-cargo planning when needed
The free tool accepts up to two carton sizes in one container. It cannot represent an order with more than two footprints, different stacking limits, palletized and loose cargo together, or goods that require different orientations. Replacing those differences with an average carton can produce an attractive estimate that describes no actual arrangement. Enter each real SKU separately in the full LoadVis workspace so the input retains the dimensions, quantities and constraints that distinguish the packages.
Create a plan, add the cargo records, choose the confirmed container and calculate a solution. Then inspect the result rather than stopping at the completion indicator. Compare each SKU quantity with the packing list and examine the remaining cargo. The full workspace requires an account and calculation points; the public pricing page describes the current plans. The free calculation remains useful as a preliminary dimensional check, but it should not be relabelled as a mixed-cargo solution.
Step 11: review physical execution before dispatch
Ask the warehouse to review door clearance, loading equipment, reachable positions, packaging strength, support under upper layers and the order in which goods will be handled. A rectangular position in a diagram does not by itself establish that a forklift can reach it or that the carton below can support it. Any unmodelled requirement should be made explicit and addressed before the plan becomes an instruction to load.
When the actual shipment differs from the planned input, update the plan and recalculate rather than editing only a screenshot or a printed total. Common changes include a substituted pallet, additional cartons, damaged packaging and a different assigned container. Keep one approved result for the current shipment version and communicate what changed. That practice preserves the relationship between cargo data, calculation and the instructions used by people performing the loading.
A repeatable check before you share the result
Start by matching carton quantity and gross mass to the packing list. Confirm centimetres rather than millimetres, outside packaging rather than product dimensions, actual equipment rather than a nominal label, and approved rotations rather than every mathematically possible turn. Review the remaining quantity as a separate operational task: those cartons still need another loading decision. A zero remaining count is useful, but it is not a substitute for checking the physical execution conditions.
You can reproduce this guide in the free calculator with 60, 40, 40, 15 and 500 as the five cargo inputs and 20GP as the container. The expected basic result is 225 loaded and 275 remaining under the stated assumptions. If your requirement involves mixed sizes or a warehouse handoff, open the full planner and the help centre, then compare the available plans on the pricing page before choosing the workflow you need.
If a colleague cannot reproduce the count, compare the five cargo inputs and the rotation setting first. Matching the calculation assumptions is the fastest way to distinguish an input difference from a genuine layout difference.